Thursday 30 January 2014

Whoohoo, and another one!

Hello everyone,

Well, I'm back with my second card for this year.  That's two in 8 days ;D!!!  I hope I can keep it up.

Again, I'm using stamps from Chocolate Baroque which I've had for quite a while but the main image I've never had time to use till now.  I chose these stamps particularly because I know that Emma, for who this card was made, loves CB stamp designs.  She also loves pink but I'm afraid I don't so I hope she forgives me, lol!

The main image is from A5 set Butterfly Flourish and the gorgeous swirl in the corner is from A4 set Butterfly Dreams.  The sentiment is also a CB stamp. (EDIT: After being asked the question I just checked up on the sentiment stamp and it's from an old Elusive Images (now Chocolate Baroque) set and is nolonger available :-( .  It's a shame 'cos there's some lovely sentiments and fonts on the A5 set). 


I stamped the main image onto white card with Archival black ink, coloured the butterflies with Derwent Coloursoft pencils and lightly inked the edges of the card with Versamagic Ink.  I cut a mat allowing a very narrow border to which I applied Flitter Glu (from Indigo Blu) and gilding flakes and then mounted the main image with double sided tape.


The background was created by blending several colours of Versamagic chalk ink and then I did random stencilling using The Crafters Workshop Mini Reverse Chicken Wire and Mini Art is.  I also used a small Heidi Swapp individual butterfly mask here and there but you can't really see that in the photos.  I then stamped the beautiful flourish using the Flitter Glu and then applied the gilding flakes.


I ghost stamped the sentiment first Versamagic Ink and then with Archival black ink.


The lovely leafy spray is a Tim Holtz/Sizzix die cut which was kindly sent to me by my Twitter buddy Sam.   Emma and Sam are really good friends themselves so I thought it was nice to be able to use Sam's die cut on this card and she had cut the spray from card which she had obviously coloured herself with what looked like spray inks.  It was so pretty and shimmery that I based the colours I used around it.  I layered up a paper flower which I coloured with inks and a touch of Sapphire Treasure Gold, a lovely metal flower which I also gave the TG treatment to in Sapphire and also Royal Amethyst then finished off with a little silk flower and pearl brad.

The background was matted onto coordinating card before mounting onto the base card and the main image was mounted on foam pads to give a little dimension.

I really enjoyed making this card and was pleased with the result.  Hope Emma likes it too.  It's odd how out of practice I am at making cards not having made many over the past couple of years.  Mustn't let that happen again as I love sending/giving handmade ones.

Till next time ...............

Hugs
Lesley  Xx

Monday 27 January 2014

First Birthday Card for this year.

Happy Monday All,

I hope this Monday is a good one for you.  It's rather cold here but nothing for us to complain about in this part of the Midlands.

Last week saw the birthday of Lin, one my lovely bunch of Twitter friends and it just happened to be the first birthday I had on my calendar for this year (I now have another that comes before it ready for next year ;D).  For the card I made her I used stamps from my Chocolate Baroque collection.


The main image is from Punky Romance and the butterfly/moth and the gears in the background on the base card are from Steampunk Butterfly.  The 'BE HAPPY' is from the Words of Wisdom A6 plate.  


The butterfly/moth (?) is stamped in Archival ink, coloured with Distress Ink, cut out and then embossed with clear EP before attaching by gluing just the body. The panel down the left side of the card is acetate coloured with alcohol inks and run through a cogs & gears embossing folder.  


The centre panel was stamped onto separate card (including the sentiment) with black Archival ink, coloured with Distress Ink then torn down either side before lightly inking with the same DI and attaching to the base card.


The large flower on the main image stamp does have a clock in the centre but I embellished it with a cute little clock charm to give a little more dimension.  I got the charm from a lovely bead shop in Harrogate where my Daughter lives, simply called BEAD ...... need another visit I think, lol!

That's it for today but I have another Birthday Girl in my diary for later in the week so hopefully if the postal service plays nicely again I will be able to blog her card by the weekend.  Until then .............

Hugs
Lesley  Xx

Sunday 26 January 2014

PaperArtsy Challenge for week 4 January 2014

Morning All,

This has to be a quick post as OH and I are off to our Sons for a lovely Sunday dinner.  Lots of cuddles with Alexa as it looks like she has  tonsilitis poor chick!

It's the 4th challenge week over on the PaperArtsy blog and the principal Guest DT has been the very talented Ellen Vargo.  I haven't had time to try something in her style and to be honest it's not really my thing but my #PATwit buddies have done some wonderful work and had a ball into the bargain. If  you like abstract, Ellen's blog is the place to go.  Anyway, at the week was rounded off by lovely Jo Myhill (didn't have time for her project either which is definitely up my street) and finally Linda Caine whose work I love too.  At the last minute I decided to have a go at Linda's smashing cube. To see Linda's gorgeous box, actually called an Artist Trading Block, and how she did it go HERE.  I made mine in the same way except I made my box from scratch not having the appropriate Sizzix die.  I had thought it would be relatively simple and when my buddy Sam posted her fabulous one also made from scratch that settled it.

Everything I used is available from PaperArtsy wonderful products.


I really wanted to add the finishing touches of feet and some sort of knob on top but just ran out of time.  It was fun. to make though.

Have a lovely day everyone although our English weather is doing its level best to make us all miserable .....yes, true to form it's chucking down with rain once again but now with the risk of it turning to snow :-(.

Till next time ............

Hugs
Lesley  Xx

Sunday 19 January 2014

Crikey .... I've made it again!

Hello Everyone,

I've shocked myself a little because for the 3rd week in a row I've managed to make something for the PaperArtsy blog challenge.  This week saw a relatively new crafter as PaperArtsy guest DT member and I was so pleased when I found out it was none other than one of my lovely PAtwit friends.  Not only is Julie Ann Lee a lovely lady but she's an awesome crafter who writes some pretty cool blog posts too.  I always love visiting her blog both for her wonderful creations but also because I love reading her posts ......there's usually a nice story in there ;D!

Anyway, if you go to the PaperArtsy blog HERE you can follow her three posts for the week which show all the details of the beautiful casket she created along with it's contents.  I didn't have time to create the total project so I chose to design a tag taking elements from each of the three posts.  I created the painted background for my tag as Julie Ann did for a couple of her tags in her 3rd post and I made a couple of embellishments from Fresco painted Shrink Plastic which Julie Ann did in her first post.  If you visit the PaperArtsy blog I'm sure you will be able to pick out the similarities so once again I'll forgo the explanations, although I did make a few little turns from Julie Ann's techniques and just show you photographs of my tag.


The butterfly is stamped onto designer script paper which has been painted with Fresco Finish and edged with Treasure Gold.  The oval is Shrink Plastic painted with Fresco Finish as Julie Ann did.


This shows some of the 'marbled' paint background detail together with the stencilling.


Here it's the butterfly that is stamped onto Fresco Finish painted Shrink Plastic and the oval is the painted designer paper cut out with a deckle edged oval die. 


I used all PaperArtsy Fresco Finish paints, Treasure Gold and stamps for the tag except for the feather stamp which is a Chocolate Baroque stamp.

An added bonus for me this week is that I managed to make my tag fit the Dragon's Dream Tag It On challenge which has a theme of the letter 'L' (mine is Love Letters), script and of course, stamping.  Julie Ann has just joined a couple more of my Twitter friends over on the Dragon's Dream DT.

See you again soon and until then ...............

Hugs
Lesley  Xx

Sunday 12 January 2014

Whoohoo! Two projects and posts in one day ...................

.............. unheard of in this neck of the woods, lol!

I was doubly inspired by the PaperArtsy design team this week as Clare Lloyd had shown us three lovely projects and Joanne Wardle returned with a guest spot too.  As I loved both their cards I decided to take bits from each and made a card.

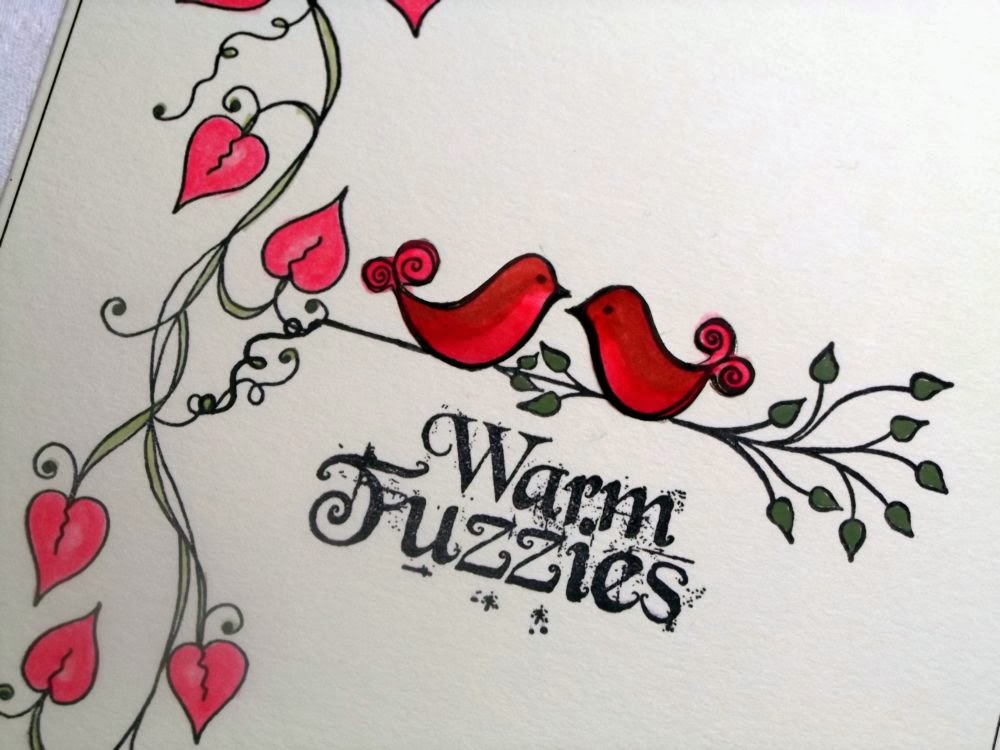
This is Clare's card and this is Joanne's if you want to pop over and see which bits I pinched ;D.  I'm quite chuffed because I finally managed to ink up one of my lovely Darcy stamps which have been waiting patiently to be used. I've also used the little birdies from the Squiggly Ink stamps and the sentiment is from the same set Joanne used on her card.  I've coloured everything with Fresco paints and layered the little birds giving them a bit of shaping before sticking to the card.  Hope you like it!


Sorry the photos aren't quite up to standard but I had to take them using my craft light because it's almost dark here now.

Thanks to the PaperArtsy DT this week for their fab inspiration.  If I'd had time I reckon I could have gone on for quite a while with projects they had kick started.  Perhaps I'll keep the ball rolling if boring stuff doesn't get in the way ............. like the ironing I should have done today, lol!

EDIT : I forgot to actually say that I'm entering this in the PaperArtsy Challenge, lol!

Hugs
Lesley  Xx

I'm in Luuuurrve .............

.......... with turquoise and orange!

Happy Sunday to all  you lovely visitors and I hope you have all had a good week.

Once again I am making the deadline for this week's PaperArtsy challenge almost by the skin of my teeth. When I called it a day at about 1.00 am this morning I didn't think I was going to make it and if Leandra hadn't changed the deadline to 5.00 pm I wouldn't have, lol!  But, I took another look this morning and decided if I ignored the ironing (which wasn't a hard decision ;D) it was doable as it only needed assembling.

This week over on the PA Blog we have been treated to some lovely fun projects by an artist who is new to me personally.  Clare Lloyd is a very talented lady and her blog is well worth a visit if you don't already know of her work.  Her pieces make me smile which is always a good thing.

I loved all three of Clare's projects but decided to go with her second one....... I seem to have a thing for 7 x 5 canvases at the moment, lol!  Once again I won't give the how-to as I more or less followed Clare's method.  I loved her colour combo so much that I have used the same colours she did and in fact my canvas is pretty much a shameless copy of hers which you can see HERE except that I really had to improvise with stamps.  The swirl I used is actually a tree from one of the Squiggly Ink sets and the two smallest birdies are Squiggly Ink too but the other stamps are mostly JoFY (for PaperArtsy), even the tiny circles one in the background, filled out with a few little flowers & teensy butterflies from a freebie set I had in my stash.


This shows the alternative stencil I used which is new in my stash .....love it!


The swirly tree top worked quite well as did the JoFY circles.


I decided to take a little time and shape my flowers a bit as I never really like flat petals. My hot glue gun seems to have found a new home with my DS so I used Pinflair gel to give a bit of dimension.


So there you have my offering for the PaperArtsy challenge this week.  There were several other projects I would love to have had a go at too but I just couldn't seem to get myself going this week.  I need to buck my ideas up I think, lol!

Right, I must away for a thrilling (not) supermarket shop!  I hope you all have a good week ahead and will see you again soon.  Till then ..............

Hugs
Lesley  Xx

Sunday 5 January 2014

PaperArtsy meets Finnabair ...... a match made in crafting heaven!

Hello Everyone .......

....and Happy New Year!  I hope you have all had a good start to 2014 but if any of you poor folk here in the UK or over the pond in the USA (or anywhere else if it comes to it) who have been badly affected by the awful weather drop by, I do hope you get some respite very soon and can get back to normal very quickly.  I have felt very lucky that we haven't had any problems with the storms (apart from being fed up with it) unlike thousands of others.

As I mentioned in my last post, the wonderful Leandra Franich has been treating us to some fab instructional videos over on the PaperArtsy blog for the past couple of weeks.  The techniques she has shared using the gorgeous products they produce and sell have been brilliant and visitors were invited to enter the PaperArtsy Challenge using the inspiration shared in the videos.  I would have loved to have made something for each of the three videos but free time has been in very short supply over the Christmas/New Year period so I've only managed one.  Still, that's better than last time because I've made the deadline, yay!!!

At the end of November last year I was lucky enough to attend my third Anna Dabrowska (aka Finnabair) workshop and (totally starstruck) I got to sit next to MRS PAPERARTSY, lol!  Seriously, it was a fabulous day shared with several other of my Twitter friends too and in the video I chose to use as inspiration, Leandra has referred to Anna's style but instead of her usual metallic paints or spray inks, Leandra used their fabulous Fresco acrylic paints and Treasure Gold metallic wax.

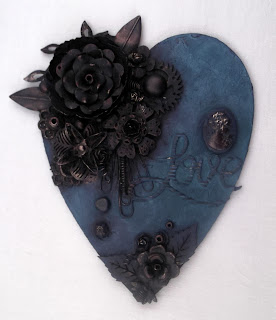
Once again, I am not going to give the 'how to' for this project as you would be much better off going over to watch Leandra's video which I followed as near as possible.  I used an MDFMan heart because I had already primed one extra back in November for the decorations I made.  I went out of my comfort zone a bit with these particular shades of blue with just a little Blood Orange added to the last two coats but I'm quite happy with the result especially once I added the Treasure Gold in Royal Amethyst and White Fire.

Here is the heart with just a blue basecoat of Fresco acrylic paint and all the embellishments in position.


This is when I thought it was finished but I had put the Treasure Gold on by artificial light and this morning I decided to add more White Fire as the Royal Amethyst didn't quite show up enough.


A few close up sections.

This bit was before I added more White Fire TG.


I've used bits of cheap jewellery bought specifically to break up for embellies, springs from broken pegs and from the innards of an old portable phone.  Anna is responsible for me getting some very weird looks from my OH because I retrieve stuff from the pile destined for the local recycling plant ;D!

 
I love how the TG has picked up details of the tiny bit of lace.


 And this is when I finally deemed the piece finished.  I'm quite surprised (and pleased) at the grungy look I ended up with as it certainly wasn't my intention at the outset, lol!


Well, that's my entry for this weeks PaperArtsy Challenge and I'm hoping to join in quite a few more this year.  A new semester of PA Guest Designers starts tonight and I can't wait to see who the first one is and what they have in store for us.

I hope to be back again very soon and until then ................

Hugs
Lesley  Xx