Showing posts with label Lavinia Stamps. Show all posts

Saturday, 11 November 2017

And ....another catch up!

Hi Everyone,

Tonight's catch up comes to you courtesy of the only fairy stamps I like....beautiful Lavinia images by Tracey Dutton.  I always call them fairies for grown ups, lol!

A couple of weeks ago my crafting friend Emma came for an inky stamping session.  She wanted to have a play with my Distress Oxide inks before deciding whether she needed to buy any (I told her she would, lol) so we both created a few backgrounds which we saved for later stamping on and we also had a go at an alcohol ink technique as demonstrated by Tracey Dutton on one of her YouTube videos.  I'd already had a practice at one of these backgrounds, then made another one with Emma and turned them into cards.  These cards are the result of our time in my craftroom.....doesn't time fly when you're having fun!  The afternoon was gone before we realised it and now we can't wait to try out something else.

This first card was an Oxide background with main images stamped with Versamark and embossed with white ep.


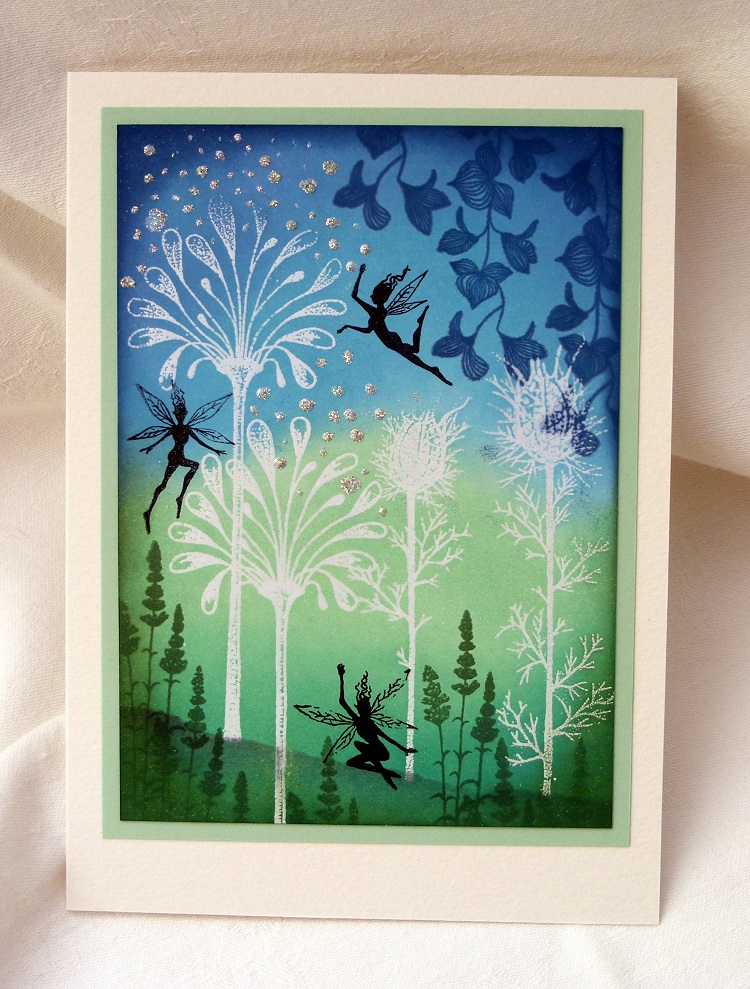
I then used Archival ink to stamp the other images in various colours and used torn paper and a sponge to create the slopes at the bottom.  Oh yes some touches of stickles sparkle to finish off!


This second card was also an Oxide background which I loved but it was a bit dark for creating a little scene so I used the birches stencil and some white acrylic paint to stipple through.  I loved the misty woods effect I got.
 
 I added the fairies and toadstools with Archival ink and the fairy 'dust' with gold paint which didn't work too well so I finished off by added stickles to wings, toadstools and fairy dust.


Third card was the first of my alcohol ink experiments after watching Tracey's video.  She makes it look so simple and I suppose it might be with a little practice, lol! 
 

Anyway, after creating the background I added stamping with Archival again to create the little scene.  For this one I used my new Be Creative stamp press to stamp the silhouette fairy.  What a fab tool this is turning out to be and imo it really comes into its own for silhouettes as I never get a good image first time.  It took me three goes before I was happy with this lovely image and even the lacy wings had lost none of their definition.


Fourth and final card for tonight was created in the same was as the previous background.


After stamping the beautiful tree I coloured it with Amsterdam acrylic inks then added the little dots of various Stickles colours to coordinate with the alcohol ink colours I'd used.  I think it looks like the fairy has decorated a tree in her garden with 'fairy' lights for Christmas, lol!


That's all for tonight folks but there are still quite a few more catch up shares to come over the next week or so.   See you again then I hope.

Hugs
Lesley  Xx

Tuesday, 19 October 2010

My Lovely DIL loves Fairies!

Hi Everyone,

I do hope you get some of the lovely sunshine I can see through my window today although I suspect it's not very warm outside.  I shall find out shortly when I take the Snoopster for a walk.

Well, I sure made up for posting 2 days in a row didn't I?  Not a peep for nearly 2 weeks now but it's mainly because I have been making Design Team stuff which, of course, I can't show.  I did make a card for my lovely Daughter in Law last week though so I am sharing it today.  She loves fairies so I used Lavinia stamps to make her card.  They are what I call 'Fairies for Grown-Ups', Lol!  I love those silhouette stamps, have quite a few, rarely get time to use them - sound familiar anyone?


I used a Big and Juicy Waterfall inkpad to brayer the background colour.  I'm definitely a novice at brayering but I hope to improve my skills at a workshop with Lesley Wharton at Graphicus that I'm going to very shortly.  To add a bit of texture I picked up a bit of ink on a piece of textured sponge and dappled it very lightly onto the bottom of the image taking it over the edge and continuing onto the bottom of the card and I also echoed the hanging vine on the top of the base card too.  I added a little bit of Stickles in Patina on the fairy's wings and to the fairy dust she is sprinkling in the water.


All the stamps I used are from Lavinia except for the sentiment at the top which was made up from a very useful set of words and phrases from Elusive Images called Celebrations (there are 3 A6 plates in the range) and the grass around the fairy which is from Elusive Images Wild Meadow plate.

Thanks to all who visit and especially if you find time to leave a comment.  I hope to post a tag I made for a friend in a couple of days time.  Till then, hope your days are filled with as much sunshine as possible.

Hugs
Lesley  Xx

PS      Ooooh, nearly forgot.  Have you visited our Craft Stamping Quartet blog recently.  My buddy Jo has posted the most gorgeous creation (the inspiration for which came from an Isabelle Norris project) and I'll be posting my own effort possibly later today.  I have to admit that I almost chickened out after Jo posted her's because I feel mine is rather lacklustre to say the least but then I decided it was only fair to show things I'm not happy with as well as things I am.

Tuesday, 18 May 2010

A Birthday Gift and my 1st Challenge Entry.

Hello Everyone,

First of all can I just say a thankyou to those who left lovely messages on my last post written when I had a nasty cold virus. Although it knocked me for six last week, I was much improved by the weekend and just have a bit of a lingering cough now. Oh yes, and all the jobs to catch up on that didn't get done while I was feeling yucky.


My project today is one of those jobs but I have to say, the pleasantest one, unlike the stack of ironing, Lol! My lovely DIL asked me to decorate a box for her to fill memories for her mum's 50th birthday so this is what I came up with.


I was going to give you a blow by blow of how I've done it but decided I really didn't want to bore you all to tears so instead, I'm just going to give you the photos and if there is anything you would like to ask about what I've used or how I've done something, please just leave me a comment and I'll answer if I can. I'd just like to mention that the bird and cage was kindly sent to me by a lovely American blogging friend, Suzz, and you really should give her wonderful inspiration filled blog a visit, or three!


The roses I made from metal and the blue butterflies are punched from black card with a Martha Stewart punch and then embossed with Moonglow Peacock EP.

I distressed the edges of the side panels before touching them with gold Pentouch.


All the tiny butterflies from the Marth Stewart pop up border I dabbed with Versamark and a little embossing powder and used them to decorate here and there.

I'm taking the box to my DIL later this afternoon so I do hope she and her mum are going to like it.

AND, I've decided to enter this project as my very first challenge entry. I don't normally get time for them but I think this one fits the requirements of The Sir Stampalot Challenge for May which is Butterflies and Blooms and I certainly have plenty of those in here, Lol. The prize they are offering this month is absolutely awesome so I thought I'd have a go. Mind you that's if I can get the linking back to me bit right, Errrr!

Well, I'm off to take the dog for a walk before I pick my little granddaughter up at 4.30. Oooh, it is nice to see a bit of sunshine again and without it being freezing too. I hope you're all having a good day (even if it involves work).

Hugs
Lesley Xx